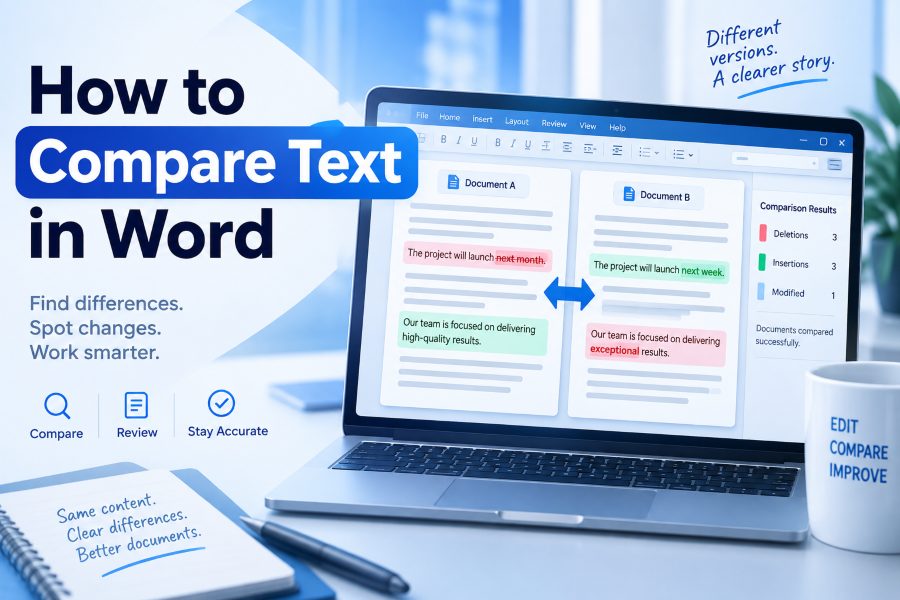
Comparing two documents manually can be frustrating, especially when they contain hundreds of paragraphs, formatting changes, or small edits that are difficult to notice. Whether you are reviewing an assignment, checking a business contract, editing a report, or comparing two versions of an article, identifying every change is important.
Fortunately, Microsoft Word includes built-in features that make document comparison easier. Instead of reading two files line by line, you can use Word’s Compare feature to identify additions, deletions, and other revisions automatically.
So, how do you compare text in Word? Open Microsoft Word, go to Review → Compare → Compare, select your original and revised documents, and click OK. Word will generate a comparison document that displays the differences using tracked changes.
In this guide, you will learn how to compare text in Word, highlight differences, view documents side by side, understand revision marks, and troubleshoot common comparison problems.
Why Do You Need to Compare Text in Microsoft Word?
Text comparison helps you identify exactly what has changed between two versions of a document. It is useful whenever multiple people edit the same file or when you need to verify that a document remains accurate after revisions.
Imagine sending a business proposal to a colleague. They make several changes and send it back. Without a comparison tool, you would need to reread the entire document to identify their modifications.
Word’s comparison feature helps you spot those differences more efficiently.
Common situations where document comparison is helpful include:
- Academic writing: Compare assignment drafts, research papers, and edited manuscripts.
- Business documents: Identify changes in proposals, reports, and presentations.
- Legal documents: Review modified clauses, deleted sentences, and newly added conditions.
- Content writing: Compare original articles against edited or rewritten versions.
- Team collaboration: Understand how a document changed after receiving feedback.
- Proofreading: Check whether requested corrections were applied correctly.
Document comparison is particularly valuable when changes are subtle. A single deleted word or altered number can significantly change the meaning of a sentence.
By comparing the original and revised versions, you can identify potential errors before finalizing your work.
How to Compare Text in Word Using the Compare Feature
The easiest way to compare two Word documents is to use the built-in Compare feature.
This method is available in desktop versions of Microsoft Word, including Word for Microsoft 365 and Word 2024. The interface may look slightly different depending on your version.
Follow these steps to compare documents and identify changes automatically.
Step 1: Open Microsoft Word
Launch Microsoft Word on your computer.
Make sure both documents are saved and accessible. For example, you might have two files named:
Original-Document.docxRevised-Document.docx
The original file should contain your initial content, while the revised file should contain the updated version.
You can open both documents before starting the comparison, although selecting them directly from the comparison window is also possible.
Step 2: Navigate to the Review Tab
At the top of Microsoft Word, locate the ribbon menu.
Click the Review tab.
This section contains tools for proofreading, tracking edits, adding comments, comparing documents, and reviewing revisions.
Look for the Compare button within the ribbon.
Step 3: Select the Compare Option
Click the Compare button to open its dropdown menu.
You may see two options:
- Compare
- Combine
Select Compare.
This option is designed to identify differences between two versions of a document.
The Combine option serves a different purpose. It is primarily used when you want to bring revisions from separately edited copies into one document.
For a straightforward comparison, choose Compare.
Step 4: Choose Your Original Document
A dialog box titled Compare Documents will appear.
Under Original document, select the first file you want to compare.
You can choose an existing document from the dropdown menu or browse your computer to locate the file.
For example:
Original document: Article-Version-1.docx
This file will serve as the reference against which the second document is compared.
Make sure you select the correct original file. Choosing the files in reverse order changes which revisions Word identifies as additions and deletions.
Step 5: Select the Revised Document
Next, locate the Revised document field.
Select the second document containing your updated text.
For example:
Revised document: Article-Version-2.docx
Microsoft Word will compare the revised content against the original content.
You can also use the Label changes with field to provide a descriptive label for the comparison.
This can be helpful when reviewing several versions of the same document.
Step 6: Configure Comparison Settings
Before running the comparison, review the available settings.
Click More, if necessary, to expand the comparison options.
Word allows you to choose which types of modifications you want to compare. These can include text changes, formatting, comments, and other document elements.
You can also choose whether changes are displayed at the word level or character level.
Word-level comparison is useful when reviewing rewritten sentences, paragraphs, or general content changes.
Character-level comparison provides a more detailed view of small differences within words.
For most articles and business documents, word-level comparison is a practical starting point.
Under Show changes in, select New document to preserve both source files.
Microsoft recommends a new comparison document as the default approach because choosing to display results directly in the original or revised file can modify the selected document.
Step 7: Click OK to Compare
Once you have selected both documents and configured the settings, click OK.
Microsoft Word will process the two files and create a comparison document.
The results display the differences using tracked revisions.
Depending on your layout, you may see a central comparison document, a revisions pane, and separate views of the original and revised files.
Review the highlighted changes carefully to understand what was added, deleted, or modified.
Finally, save the comparison result using a descriptive filename, such as Article-Comparison.docx.
You now have a separate document containing the differences between the two versions.
How to Compare Two Word Documents Side by Side
Sometimes, you may prefer to read two documents next to each other instead of generating an automatic comparison.
Microsoft Word includes a View Side by Side feature that allows you to display two documents simultaneously.
This method is especially useful when you want to inspect the content visually or compare document layouts.
Step 1: Open Both Documents
Open the two Word files you want to compare.
Make sure both documents are available in separate Word windows.
Step 2: Select the View Tab
Navigate to the ribbon at the top of Microsoft Word.
Click View.
Find the Window group and select View Side by Side.
Word will arrange the documents next to each other on your screen.
Step 3: Enable Synchronous Scrolling
Select Synchronous Scrolling from the View tab’s Window group.
This feature allows the two documents to scroll together, making it easier to examine corresponding sections.
If the button is hidden, look under the Window menu.
Microsoft documents both View Side by Side and Synchronous Scrolling as built-in viewing features.
Step 4: Review the Differences Manually
Read the two documents and look for differences in:
- Words and sentences
- Paragraph structure
- Headings and formatting
- Numbers and dates
- Tables and other content
You can also use Word’s Find feature to locate specific phrases in each document.
Important: Side-by-side viewing does not automatically identify text differences. It simply places the documents next to each other for manual inspection.
If you need Word to highlight the changes automatically, use the Compare feature instead.
How to Highlight Differences Between Two Word Documents
Highlighting differences helps you quickly identify what has changed in a document.
When you compare documents, Microsoft Word uses revision marks to indicate modifications.
However, the exact appearance depends on your markup settings.
Show All Markup
After generating the comparison document, go to Review.
Find the Display for Review dropdown and select All Markup.
This setting displays the recorded changes rather than hiding them in a simplified view.
You may see newly inserted text, deleted content, formatting modifications, and other revision indicators.
Understand Insertions and Deletions
Inserted text often appears with underlining or colored markup.
Deleted text may appear with strikethrough formatting or in revision balloons.
For example, consider these two sentences.
Original text:
“Our software helps users compare documents.”
Revised text:
“Our software helps users compare documents quickly.”
The word “quickly” has been added.
Word’s comparison result will identify that addition as a revision.
Now consider another example.
Original text:
“The application is completely free for all users.”
Revised text:
“The application is free for all users.”
Word will identify “completely” as deleted content.
The precise colors and visual indicators depend on your Word settings. You can change how revisions appear using the Track Changes display options.
Review Formatting Changes
Sometimes, the words remain identical, but the document’s appearance changes.
For example, a reviewer might change a heading from regular text to bold or modify its font size.
If formatting comparison is enabled, Word can identify certain formatting differences.
If you only care about changes to the written content, consider disabling formatting comparison before running the comparison.
This helps reduce unnecessary revision marks.
How to Compare Text in Word on a Mac
Microsoft Word for Mac also offers document comparison functionality in supported desktop versions.
The process is similar to the Windows method, although menu labels can differ.
Follow these instructions:
- Open Microsoft Word on your Mac.
- Open one of the documents you want to compare.
- Click the Review tab.
- Select Compare and then Compare Documents.
- Choose the original document.
- Select the revised document.
- Click OK.
Word will generate a comparison result showing the changes with revision marks.
The original file remains unchanged in the standard comparison workflow.
Microsoft’s instructions for Word 2019 for Mac confirm this process and also describe options for merging document versions.
If you cannot locate the comparison option, check your Word version and confirm that you are using the desktop application rather than Word in a browser.
How to Compare Text in Word Online
Many users access Microsoft Word through their web browsers.
Word for the web supports document editing, collaboration, comments, Track Changes, and version history.
However, it does not include the same built-in Compare and Merge revisions functionality available in desktop Word.
If you are using Word online, you have several alternatives.
Option 1: Open the Document in Desktop Word
If you have Microsoft Word installed, open your document in the desktop application.
Then use Review → Compare to compare the files.
This is the most direct way to access Word’s full comparison functionality.
Option 2: Check Version History
If your document is stored in OneDrive or SharePoint, you can access its version history.
Open the document, select its filename or the relevant version history option, and examine previous versions.
Depending on your environment, you may be able to inspect historical changes or restore an earlier version.
Version history is particularly useful when people collaborate on the same document over time.
Option 3: Use an Online Text Comparison Tool
If you only need to compare plain text, you can copy content from both documents and paste it into a dedicated text comparison tool.
For example, a tool such as TextComparely can be used for a text-focused comparison workflow.
Visit TextComparely , enter the original text and revised text into the comparison fields, and use the available comparison controls to inspect the differences.
This approach is convenient for comparing article drafts, paragraphs, code snippets, and other text-based content without using Word’s document comparison feature.
However, copying text out of Word may lose formatting and document-specific elements. For detailed formatting or legal document reviews, use Word’s native comparison function.
Compare vs. Combine vs. Track Changes in Word
Microsoft Word provides several reviewing tools, but they serve different purposes.
Understanding the differences helps you select the appropriate method.
| Feature | Main Purpose |
|---|---|
| Compare | Identify differences between two document versions. |
| Combine | Bring revisions from separately edited copies together. |
| Track Changes | Record edits while a document is being modified. |
| View Side by Side | Display two documents for manual inspection. |
For example, if someone sends you an edited document without enabling Track Changes, the Compare feature can help identify what changed.
If several colleagues have edited separate copies of your document, Combine may be more appropriate.
How to Accept or Reject Changes After Comparing Documents
After comparing two documents, you may want to create a final version that includes only approved changes.
Word allows you to review revisions individually.
Open the comparison document and navigate to the Review tab.
Use Next and Previous to move between individual changes.
Click Accept to keep a change or Reject to discard it.
Continue until you have reviewed all revisions.
Once the review is complete, save the finalized document separately.
Remember that selecting No Markup only hides revision marks. It does not permanently remove the tracked changes. You must accept or reject them to resolve the revisions.
Microsoft Support
+1
Common Problems When Comparing Text in Word
Document comparison is straightforward, but some problems can make the results confusing.
1. The Compare Button Is Missing
Check whether you are using Word for the web instead of the desktop version.
Also, expand the Review ribbon if your Word window is narrow.
If comparison is unavailable, open the document in a supported desktop version.
2. Too Many Formatting Changes Appear
Documents created with different templates or styles can produce numerous formatting revisions.
Run the comparison again and disable unnecessary formatting options.
This allows you to focus on text-related changes.
3. Word Displays a Tracked Changes Warning
If either document already contains tracked changes, Word may display a message asking how to proceed.
Microsoft’s comparison process can accept existing revisions for comparison purposes.
If preserving the original revision history is important, save separate backup copies before proceeding.
4. The Comparison Results Are Difficult to Read
Switch to All Markup and adjust the display settings.
You can also hide the original and revised source document panes to give the comparison result more space.
5. Differences Are Not Showing
Verify that you selected the correct files and that the documents contain different content.
Check the comparison settings to ensure relevant change types are enabled.
If necessary, reverse the document selection and compare again to understand the direction of the changes.
Frequently Asked Questions
1. Can Microsoft Word compare two documents automatically?
Yes. Desktop Microsoft Word includes a Compare feature that identifies differences between original and revised documents. Go to Review → Compare, select both files, and click OK.
2. How do I compare two Word documents and highlight differences?
Use Review → Compare and generate a comparison document. Select All Markup to display insertions, deletions, and other recorded changes.
3. Can I compare two Word documents without Track Changes?
Yes. You do not need to enable Track Changes before editing. Word can compare two existing document versions and generate revision marks afterward.
4. How do I compare only text without formatting in Word?
Open the Compare Documents dialog box, expand the comparison settings, and disable formatting comparison. Keep the relevant text comparison options enabled.
5. Does comparing Word documents change the original files?
By default, Word creates a separate comparison document without modifying either source file. Choosing to display changes directly in the original or revised document can modify that selected file.
6. Can I compare two documents in Word for free?
Word for the web does not provide the desktop application’s Compare feature. If you do not have access to desktop Word, you can manually inspect document versions or use an online text comparison tool for plain-text differences.
Conclusion
Learning how to compare text in Word can save time and make reviewing documents considerably easier.
Microsoft Word’s built-in Compare feature allows you to detect additions, deletions, formatting modifications, and other changes without manually reading two documents line by line.
For detailed comparisons, use Review → Compare. If you prefer visual inspection, View Side by Side offers a convenient alternative.
If you only need to compare text without opening desktop Word, an online text comparison tool offers another approach.
Regardless of the method you choose, always review the differences carefully before accepting revisions or finalizing an important document.